Nunholy - A primer for beginners
This guide servers as an introduction to Nunholy, as well as cover some of the questions beginners might have and be a general useful reference.
What is Nunholy?

Nunholy is the newest game by Chowbie, a Korean artist and game developer. It is a roguelike where players can explore dungeons and battle against vampires while interacting with cute nuns hell-bent on destroying evil. If you have played Hades and Blooborne before, you'll recognize their gameplay and setting influences in this game.
You can find more about Chowbie over at their Twitter account: @Chowbie_
Chowbie's other game is Wedding Witch, found below:
About this guide
Compared to Wedding Witch, Chowbie's previous game, Nunholy is relatively more complex and with more systems to engage and keep track of. This guide is thus meant to serve as an additional help for beginners, to quickly reference basic things and to serve as a general aid for players.
This guide will not serve as a full step-by-step walkthrough, cover builds in-depth or discuss boss strategies too deeply.
On another note, I'd like to thank player Godspeed for their initial guide on doors, it served as a basis for this guide's corresponding section. You can check it out here:
- Nunholy - 100% Achievements Guide
- Nunholy - Doors Guide
The basics
Your goals
Your aim as a half-vampire is to find the Vampire Queen and destroy her heart, severing the head of the recently organized vampire attacks. To do this, you need to embark in various hunts to increase your Hunter Rank and arm yourself with better weapons and skills to confront the Vampire Queen.
Gameplay loop
If you've played Hades or other roguelikes before, you will know the way you'll progress in this game. The idea is to run dungeons while accumulating resources to slowly become more powerful. Since upgrades and affinity increases are permanent, this means that investment in those will pay dividends in later runs as each additional dungeon run will become easier. Eventually, you'll be strong enough to challenge the Vampire Queen.
Interacting with allies and affinity
Whether at the 7th Parish or during a run, you can interact with friendly NPCs that offer you their services for a fee. You can increase your affinity with them by offering items they value, though only dungeon allies can have their affinity increased with Rubies.

Increasing their affinity lowers the prices of their goods and increases the effects of their services, these effects carry over between runs, so it's worth investing in them whenever you can.
Some NPCs like Nemera and Seraph offer extra services such as healing you. How many times you can access these services depends on the amount of interactions available, so be smart about it. Note that increasing affinity does not count as an interaction.

Becoming stronger
Upgrades to your skills and attributes done in the Parish, as well as affinity levels from dungeon allies, are permanent and cross-runs. Upgrading these are an investment into your later runs. The more you invest, the stronger you become, the faster you can clear easier dungeons and the quicker you can return to the point where you are actually making progress. Remember to level up your skills, weapons and increase affinity with the nuns!
Hunter Rank
Your Hunter Rank determines your boons you receive on starting a new run and can be increased by completing quests for Platina back at the 7th Parish. These benefits stack with previous ranks, meaning that at Rank C you receive a free random artifact and an amount of Bloodstones. Below all ranks and benefits. Your rank also determines what upgrades you have access to at the 7th Parish.
| Rank | Benefits |
|---|---|
| F | One free random artifact at the beginning of each new run. |
| E | One free random artifact at the beginning of each new run. |
| D | 100 Bloodstones granted at the beginning of each new run. |
| C | 100 Bloodstones granted at the beginning of each new run. |
| B | Allows you to replace weapons and skills on reaching a new dungeon, instead of only at the beginning of the run. |
| A | Grants one additional free artifact at the beginning of each new run. |
| S | Unknown. |
Currencies
As you progress through the dungeons, you will find currencies you can use to buy items, services and increase affinities.
| Currency | Where to find | Uses | Notes |
|---|---|---|---|
Ruby  | - Reward for clearing a Ruby Chamber. - Granted after opening a dungeon's portal to the boss room. | - Increase Affinity of dungeon allies. - Upgrade skills at the Parish. | - Permanent and cross-runs. |
Silver Coins  | - Reward for clearing a Silver Chamber. - Granted after opening a dungeon's portal to the boss room. | - Upgrade skills at the Parish. | - Permanent and cross-runs. |
Bloodstones  | - Granted by breaking Fresh Blood crystals. - Dropped when attacking minibosses. - Breaking crystals in a Blood Crystal Chamber. - Selling artifacts. | - Purchase items. - Purchase artifacts. | - Lost on death. |
The Vampire Hunters
The game has three playable half-vampire huntresses: Preiya, Marie and Sain. Each of them has a unique playstyle and a default damage type inclination, though they can be customized to change to whatever damage type is preferred. You could, for example, make all of Marie's kit deal burn damage, if you want. Knowing the strengths and weaknesses of them is key to making it all the way to the Vampire Queen.
Note that each character represents a save-file, as such, currency, ranks and unlockables cannot be shared between characters.
Preiya

- Combat style: Melee
- Damage type: Physical (axe/skill) / Burn (gun)
Preiya serves as the poster girl of the game of sorts and is one of the strongest hunters in my opinion. She is a melee damage-dealer equipped with an gunaxe that gives her both melee and limited ranged options.
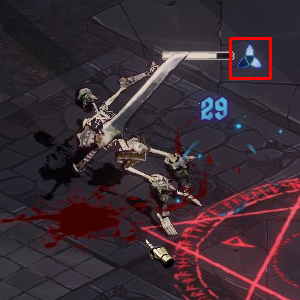
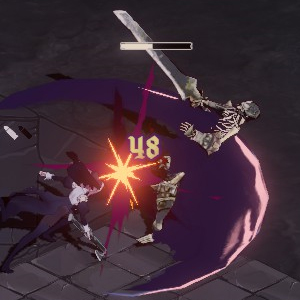
Her LMB attack can combo three times and has an innate crit chance due to dealing physical damage. Each attack does a different base amount damage, increasing in her 3-hit combo. The first attack deals 48 DMG, the second 72 DMG and the third 96 DMG base without upgrades. Attacks don't need to connect to increase damage, meaning if you whiff your first attack but hit the second, the second will still do 72 DMG.
Her RMB shoots buckshot from her gunaxe, pushing enemies back and applying a burn. You have two ammo which recharges slowly. It can be useful for catching enemies that prefer to stay at range. Lastly, her Spinning Slash skill moves her forward to deal moderate AoE damage.
Marie
- Combat style: Ranged
- Damage type: Holy (gun) / Burn (charged gun/skill)
Marie is your ranged damage-dealer, shooting holy damage to smite enemies from afar. As you shoot your weapon, it will gradually begin to overheat until it stops working. Using your RMB will then consume the heat to blow enemies in a line and applying a small burn effect. Essentially, your loop will be to shoot with LMB until the gauge is full and the release your RMB. You cannot use your RMB without heat and for the most part, is not worth using unless full and be mindful that your LMB roots you in place, leaving you vulnerable.
In my opinion, Marie is the easiest character to run not due to damage output but because of the relative safety you enjoy being ranged. It, in short, gives you more time to react to enemy attacks. Don't underestimate her damage potential, however, as her holy weapon can trigger Purification and quickly.
Finally, her personal skill is a grenade that deals respectable. The throw distance is rather short, so it's best to use at mid-distance.
Sain

- Combat style: Hybrid
- Damage type: Holy (swords) / Physical (daggers/skill)
Sain is a melee/ranged hybrid damage-dealer fighting with twin-blades and throwing daggers. She is more complex to play as her playstyle consists of being mobile, striking fast and making ample use of her fan of daggers ability. Her LMB attacks are quick, have a longer-than-normal melee range and can pierce enemies. These holy-type attacks can trigger Purification as well.
Her RMB throws a fan of daggers that can crit. Sain always uses the maximum amount of charges available, which slowly recharge over time when depleted. When hitting an enemy, there's a chance for a sword to spawn, picking this up will instantly grant one charge of your fan of daggers.
Finally, her skill spawns five swords around her that attack and disappear after connecting with an enemy. This is useful when charging into tight groups of enemies as the damage is quite respectable.
Combat
Combat is played from an isometric perspective and in real-time, much like other games of the genre. As a vampire hunter you are armed with a main-weapon, a sub-weapon, a skill and an ultimate ability at all times which you can change back at the Parish.
Keep in mind that touching enemies does not deal damage to your hunter, so hugging enemies and passing through them is perfectly fine.
Damage types
There are four damage types in the game, each with their own properties.
Physical damage
The purest form of damage, physical damage source have the passive ability to critical hit for double damage.
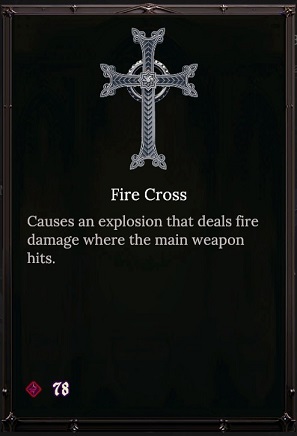
Burn damage
Burn damage leaves a damage-over-time (DoT) pip on the target. This DoT amount can stack up to three times.
Holy damage
Targets hit by holy damage have a counter over them. Once they are hit four times, it triggers Purification, dealing an additional attack for 450% damage in a small area-of-effect.
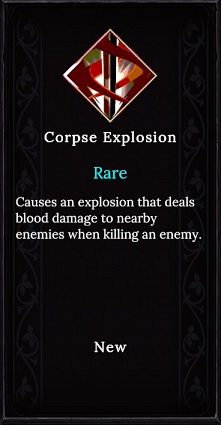
Bleed damage
Bleeding works similarly to burning, however, it synergizes with many abilities you can unlock on level up, such as dealing +X% of damage to bleeding targets.
Abilities
You will unlock abilitesas you level up by interacting with Fresh Blood or receiving Moonlight Blessings. These change how your weapons and skill work and represent a large power boost in your combat abilities.
If you've unlocked an ability, you can also have a chance to upgrade them. Max level is 5 for regular abilities and 3 for ultimates..
Artifacts
You can receive artifacts after defeating minibosses, purchasing them from Evalaine or unsealing an Artifact Altar. They often grant passive abilities to your existing weapons and skills, further enhancing them.
You can improve artifacts in the Blacksmith Chamber. You can only upgrade each artifact once, but you can carry duplicates.
General combat mechanics
Depending on who you are playing with the combat loop will change somewhat, but there are three combat mechanics to keep in mind.
Ultimate ability
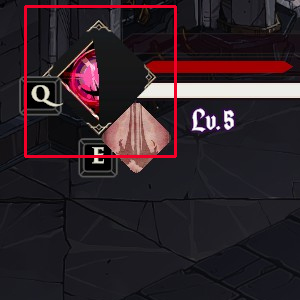
Once you unlock your Ultimate ability, you can use it with Q. You can re-use it by charging it once more by attacking enemies, each attack will refill your ult. charge slightly.
Dodge
You can use your [Shift] key to dodge. This will move you a certain distance in the direction you are facing and grant you a brief moment of invincibility (i-frames) as well as activate any relevant skills you may have learned during the run. The invincibility is brief, but if you time things right, you can nullify attacks, projectiles and area of effect damage. Dodging has no cooldown except for waiting for the animation itself to finish.
Critical hits
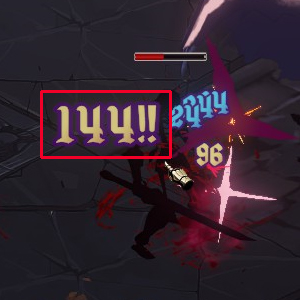
Some characters, as well as some artifacts, can critical hit. This doubles the attack's damage.
Backstab
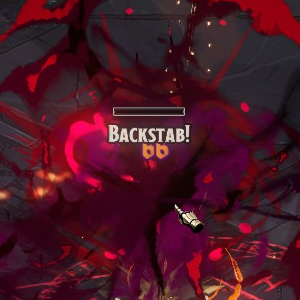
Attacking enemies from behind deals increased damage, roughly 47% more. In my experience, this backstab angle is relatively wide, so sometimes you'll see the damage bonus on what are essentially attacks from the side. All attacks including skills and Ultimate abilities can backstab.
Purification
Holy damage can deal extra damage, this is called Purification. Every fourth attack that connects will deal an extra attack that deals roughly 450% weapon damage in a small area around the target.
Flinch
Most enemies, when attacked, will be flinched interrupting their attacks. You can abuse this, but keep in mind that enemies with shields are immune to flinching until the shield is broken.
Shields
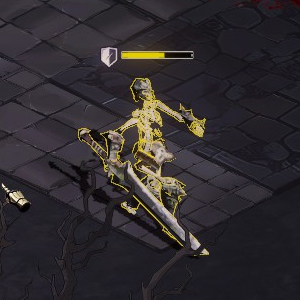
Some enemies spawn with a shield that protects them from damage and prevents flinching until broken. You can recognize them by their yellow hue and yellow lifebar, just smack them until the shield breaks to damage them properly.
Directional shields
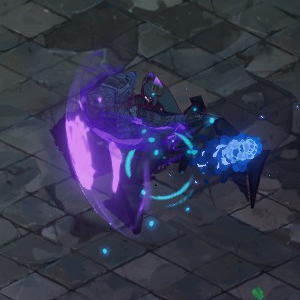
Strong enemies may sometimes have a shield that protects them from the direction they are facing. Attacks that pierce enemies will still damage them, and attacking from behind nullifies this shield.
Spiderwebs

Spider-type enemies will sometimes spawn spiderwebs on the ground. Stepping on them will slow your hunter down so it's best to avoid them altogether.
Area-of-effect attacks
Bosses and certain enemies will deal attacks in a large area. These will be marked red, simply avoid standing in them when the attack connects or use your dodge i-frames.
Player shields
If you need shields yourself, try to find Lillian beyond one of the Garlic Gates. She sells garlic which as a half-vampire grants you an amount of consumable shield. Be advised, the shield will not recharge if depleted.
Dungeon runs
A run ends either in success by killing a Dukelevel boss or the Vampire Queen or dying in an attempt. In order to reach the Vampire Queen for the first time, you will have to clear a run all the way to the current Duke level boss and slay them, destroying one of the chains locking progress to the Queen. Once all chains are destroyed, you may face the ultimate boss of the game.
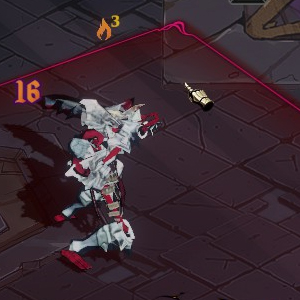
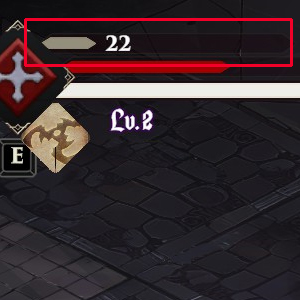
Leveling up
When clearing a chamber of enemies their blood will crystallize to form a Fresh Blood crystal. Each Fresh Blood crystal has a numerical value corresponding to the amount of blood absorbed from slain enemies, which means that rooms with large amounts of enemies translates to a greater Fresh Blood crystal.
These can be consumed to gain their value in XP allowing you to level up and gaining access to new skills or rank up skills, or destroyed to gain their value in Bloodstones. This means that you always get the choice of what to do with the blood after clearing a room. Do note that to destroy the crystal you need to be at touching distance, attacking it from afar will not do anything.
Clearing dungeons
Any time you clear a dungeon by killing the dungeon's boss and stepping through the portal, you will be presented with The Legacy of the Martyrs, a choice between powerful upgrades. After making your choice, you will be taken to the next dungeon and be greeted by Seraph who will give offer to heal you. Furthermore, any Bloodstones you had will be carried over to the next dungeon for you to use as you please.
Death
When you die in a run you'll be transported back to the 7th Parish, thereby concluding the current run as a failure. You will lose all Bloodstones but keep any Rubies or Silver Coins you found, and any skills learned or boons from the Legacy of the Martyrs will be lost as well. Fret not, however, use this chance to upgrade skills, weapons and attributes to make your next run easier. By reaching the Parish you also save your game.
Exploring dungeons
Gates
As a vampire hunter, you'll have to delve into dungeons to find your quarry. As you do, you'll find some gates marked by various different motifs, these will lead you to special chambers with unique encounters and rewards, so choose wisely.
Blacksmith Gate
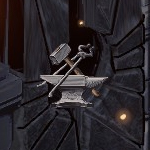
The Blacksmith Gate allows you a chance to upgrade one of your artifacts. Defeating the enemies in the room and interacting with the pentagram on the ground will allow you to drop one of your artifacts, upgrading it in the process. Can only upgrade one artifact per encounter.
Moon Gate
The Moon Gate grants you a Moonlight's Blessing upon defeating all enemies in the room. This will unlock your Ultimate ability on the very first time you receive it, while further blessings will grant you the choice of upgrading existing skills.
Silver Gate
This gate will grant you Silver Coins upon clearing the room, as well as some Fresh Blood. Useful if you need some coins for upgrades.
Bloodstone Shop Gate
This gate contains a chamber where Evalaine can be found. You can buy various objects from her using Bloodstones as currency as well as sell unwanted items.
Chalice Gate
This chamber rewards a Blood Chalice for clearing all enemies. Chalices increase your health by 25HP as well as increasing your max health by +25HP for the rest of the run.
Garlic Gate
In this chamber you will find Lillian, a vendor of garlic-related products. Garlic grants you shields, while Red Spider Lily grants you an increase of +20HP in max health and heal you for the same amount.
Blood Crystal Gate
This chamber contains breakable Blood Crystals that give you Bloodstones. Useful when you need that extra bit of bloodstones for your next planned purchase.
Heart Gate
You will find Nemera in this chamber, allowing you to transfuse blood to gain health or Bloodstones.
Pentagram Gate
This chamber contains a large number of enemies which when defeated, will transform into Fresh Blood for you to use or consume. An additional source of blood might spawn only when consuming the initial Fresh Blood. Due to the increased number of enemies, this chamber is great when you need large amounts of Bloodstones or XP.
Ram Skull Gate
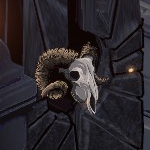
This chamber contains a mini-boss that can be fought for rewards. Attacking the mini-boss drops Bloodstones at times, and when defeated, a coffer will spawn that contains a random artifact.
Ruby Gate
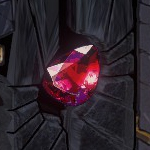
Upon clearing all enemies in this chamber, a Ruby and Fresh Blood will spawn as rewards.
Coffin Gate
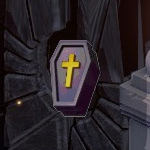
This is the last chamber previous to the boss of your current run. Four altars will be available, only one of them will open the portal to the boss. You have essentially a 25% chance of spawning the boss portal and some rubies and silver coins and a 75% chance of summoning enemies to fight against. Do note that even if you have already spawned the portal, you can still break the seal of the other altars to fight enemies for one last access at Fresh Blood before the boss fight.
Interactables
Throughout your dungeon runs, you'll find some objects you can interact with.
Fresh Blood

These will appear after slaying all enemies in a room and can be used to level up or destroyed to gain Bloodstones.
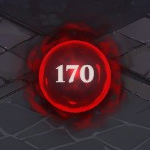
Artifact Altar
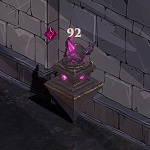
These altars will grant you a random artifact if you pay the Bloodstone price displayed. Can only be used once per altar.
Urns
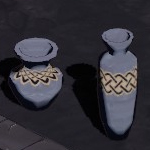
Urns are a rare source of Silver Coins. They are also valid target for attacks to refill your Ultimate charge.
Blood Crystals
These crystals appear in the Blood Crystal Gate chamber and can be destroyed to gain various amounts of Bloodstones.
Dungeon vendors and allies
As you explore the various chambers of the dungeons you might encounter friendly characters that will offer you their services. These can be life-savers during difficult runs or make bountiful ones all the more rewarding.
Evalaine
Evalaine can be found in the Bloodstone Shop chamber and will offer a random assortment of artifacts in exchange for Bloodstone. Make sure to pay her a visit if you have a large amount of Bloodstones and don't plan to level up any time soon.
- Affinity 1: Allows you to refresh the shop options once.
- Affinity 2: Artifact Sale Price +5% - increase your artifacts' sale price.
- Affinity 3: Artifact Sale Price +5% - increase your artifacts' sale price.
- Affinity 4: Artifact Sale Price +5% - increase your artifacts' sale price.
- Affinity 5: Artifact Sale Price +5% - increase your artifacts' sale price.
Lillian

Lillian can be found in the Garlic chamber where she offers various garlic-related products. Her garlics are essentially the only source of shields for a run barring skills, and she can increase your max health by +20HP through the Red Spider Lily which also heals you for the same amount. Worth visiting for particularly difficult runs.
- Affinity 1: Adds an additional pot with items to the shop.
- Affinity 2: Increases spawn rate of better quality garlic by 18%.
- Affinity 3: Adds an additional pot with items to the shop.
- Affinity 4: Increases spawn rate of better quality garlic by 18%.
- Affinity 5: All items in the shop have a 30% discount.
Nemera
Nemera can be found in the Heart chamber and offers blood transfusion services. Through them, you can heal yourself and regain lost health or sacrifice some health for Bloodstones. The amount of Bloodstones per HP lost isn't worth it in my opinion but it can come in clutch if you need to access Fresh Blood to level up. Either way, seek Nemera out if you are badly hurt.
- Affinity 1: Increases HP heal and Bloodstone amount from HP sacrifice by 10%.
- Affinity 2: Increases HP heal and Bloodstone amount from HP sacrifice by 10%.
- Affinity 3: Increases HP heal and Bloodstone amount from HP sacrifice by 9%.
- Affinity 4: Increases HP heal and Bloodstone amount from HP sacrifice by 9%.
- Affinity 5: Increases HP heal and Bloodstone amount from HP sacrifice by 8%.
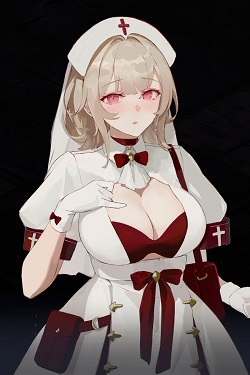
Seraph

Seraph appears at the beginning of each new run after reaching the Parish for the first time as well as upon reaching the next dungeon successfully. She will tell you about your dungeon starting rewards according to you Hunter Rank, as well allow you to change your weapons and skills via the items around her chamber. Furthermore, she can heal you and Increasing her affinity will increase all her healing by +5HP per affinity level.
- Affinity 1: Increases Seraph's healing service by +5HP.
- Affinity 2: Increases Seraph's healing service by +5HP.
- Affinity 3: Increases Seraph's healing service by +5HP.
- Affinity 4: Increases Seraph's healing service by +5HP.
- Affinity 5: Increases Seraph's healing service by +5HP.
The 7th Parish - The Hub
The 7th Parish of the Lumatrian Order serves as your main place to be between runs. You'll be able to rest here, save your progress and interact with helpful vendors and characters before embarking on your next hunt.
Denizens of the Parish
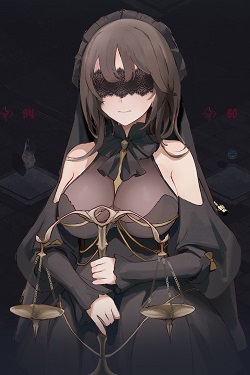
Platina

Platina serves as the main method of levelling your Hunter Rank. She offers quests that essentially work as achievements, completing these quests grants you points and upon reaching the required amount of points, your Hunter Rank will be increased to the next level.
| Appearance | Location | Role |
|---|---|---|
| Upon visiting the hub for the first time. | Northwest of the arrival point. | Offers quests to the player used to increase their Hunter Rank. |
Calina

Calina allows hunters to strengthen their vampire powers in different useful ways. The currency she deals in is Rubies, so it's worth keeping an eye open for Ruby Chambers throughout your runs. Make sure to invest into increasing the number of level up options early as it is useful at all times of the game. Some upgrades are locked behind Hunter Ranks, so try to complete your quests with Platina.
| Appearance | Location | Role |
|---|---|---|
| Upon reaching Hunter Rank E. | Directly West of the arrival point. | Offers vampire upgrades to the hunter in exchange for Rubies. |
Helena

Helena is a trader that allows you to upgrade your weapons and skills, as well as give you training to strengthen core skills in exchange for Silver Coins. Do note that if you purchase new weapons or skills you will only be able to change them at the beginning of a new run in Seraph's chamber.
| Appearance | Location | Role |
|---|---|---|
| Upon reaching Hunter Rank E. | East ofthe arrival point. | Offers weapon, skill and training upgrades to the hunter in exchange for Silver Coins. |
General tips
Affinity increases as an investment
Affinity levels carry over between runs, so it's worth investing into useful characters as early as possible in order to profit from their benefits as long as possible. Lillian will offer you better products and Evalaine's items will be cheaper, for example, things that will always be useful.
Artifacts
If you get lucky with a good artifact, you should look for the Blacksmith Chambers to upgrade them as soon as possible as some of the improvements are really hefty and they can carry you for a long time during good runs.
Helena's early must-haves
I strongly recommend investing early into increased Bloodstone and Silver Coin drop rate research. The more you play, the more this increases will translate into large amounts of currencies. These two should be, in my opinion, your priority early-game.
Damageless Nemera blood conversion
If you select the ability which grants you immunity to the first attack upon reaching a new room, you can use this to convert health to Bloodstones at Nemera without receiving damage, essentially for free. Not a bug, it's intended per Chowbie's comments.
Artifact altars
Artifact altars become pricier the longer your run goes. If you plan to arm yourselves with many artifacts, better to do it in the first two dungeons when prices are cheaper. In my opinion, Evalaine is a better source of artifacts as you get to choose from three of them for a reasonable price and can always reroll the options once.
Choosing between consuming or destroying Fresh Blood
Before you make your choice, take a look at the gates in the room. If you find you want to level up for your next skill, and one of the gates is a Moon Gate, it might be best to destroy the Fresh Blood instead since you can level up by clearing the Moon Chamber anyway.
Clear the boss rooms
Boss rooms can contain urns which drop Silver Coins so before you step through the portal to the next level, make sure to clear the room.
Vendor chambers have no encounters
If you are limping along in a bad run and just want to progress as quickly as possible while minimizing enemy encounters, choosing gates with vendors will allow you to move along faster as these chambers have no enemies.
Attack Power Boost is busted
It's a flat 15% damage increase to all your damage sources, stacking up to 90% at level 5. If you see this, grab it and don't let go.
F.A.Q.
Does this game have nudity?
No, only mildly lewd content.
Can you unlock more hunters?
Not at the moment, maybe in the future.
Are there multiple endings?
Two for each huntress.
You can get the Vampire Ending by beating the Vampire Queen having consumed blood and leveling up your skills. Essentially, beating the game above level 1.
The "secret" ending is the Human Ending, in which you beat the Vampire Queen at level 1 without ever consuming blood to level up. This means that your huntress never succumbed to her vampire side.
Any DLC coming?
We don't know, you will have to ask Chowbie about that. Maybe an artbook like for Wedding Witch?